

What Is Required for Bladder Scanner Maintenance?
When you're tasked with maintaining a bladder scanner, it's vital you understand not only the daily cleaning protocols but also the subtleties that guarantee its peak performance and longevity. You must use hospital-approved disinfectants conscientiously, adhering to the precise instructions provided by the manufacturer. Regular checks for wear and the integrity of the scanner probe are essential, as overlooked damage could compromise patient safety. But beyond the visible upkeep, have you considered what internal diagnostics are necessary to maintain accuracy? Let's explore the less obvious but important maintenance routines that could save you from unforeseen complications.
Key Takeaways
- Use hospital-approved disinfectants to clean the scan head before and after each use.
- Regularly inspect the probe for damage, especially for cracks or impairments.
- Follow manufacturer's instructions for cleaning to ensure proper maintenance and longevity.
- Conduct self-diagnostic tests regularly, displaying results on the console for review.
- Wipe down the probe with a soft cloth after each use to maintain cleanliness.
Definition of Bladder Scanner
A bladder scanner is a noninvasive tool that employs ultrasonic technology to visualize the urinary bladder and evaluate bladder emptying disorders. When you're working in an intensive care unit, it's vital to understand how this device operates. It sends ultrasound waves into a patient's body, reflecting off the bladder to provide essential data about its size and the volume of urine retained.
This device isn't just about getting a visual on the bladder; it's also about patient safety and comfort. By using a bladder scanner, you can determine whether a patient needs catheterization, thereby reducing the risk of infections associated with unnecessary catheter use. It's portable, making it easy for you to use right at the bedside.
In the bustling environment of an intensive care unit, a bladder scanner becomes an indispensable tool. It helps you quickly assess patients who might be unable to communicate their needs effectively. With the scanner, you can promptly identify any retention issues, ensuring that every patient receives timely and appropriate care.
Policy and Usage Guidelines
As you handle the bladder scanner, it's essential you adhere to policy compliance measures to maintain its efficacy and hygiene.
Familiarize yourself with the usage protocol summary, ensuring each scan is performed accurately and safely.
Policy Compliance Measures
To guarantee the integrity and safety of bladder scanner operations, you must adhere strictly to the maintenance and documentation policies outlined. Ensuring the device's cleanliness is imperative; you should wipe the probe with a soft cloth and disinfect it using bleach wipes or hospital disinfectant after each use. Regularly inspecting the probe for any signs of damage is fundamental, as even minor cracks can render the device unusable.
Accurate record-keeping is a key compliance measure. You're expected to document the voided amounts accurately when evaluating postvoid residual (PVR) to determine the necessity for further intervention. This not only secures patient safety but also aids in monitoring the effectiveness of bladder management protocols.
Education on proper scanner usage is essential. You must be aware of contraindications, such as open skin in the suprapubic region or pregnancy. Here's a quick reference table for your compliance checklist:
| Task | Compliance Requirement |
|---|---|
| Cleaning the probe | Use soft cloth and designated disinfectant |
| Inspecting the probe | Check for cracks or damage |
| Documentation of PVR | Record accurate voided amounts |
| Education on contraindications | Understand and apply usage guidelines |
| Monitoring protocol effectiveness | Regular evaluation of implementation |
Adhering to these guidelines will help maintain the operational standards and safety of the bladder scanner.
Usage Protocol Summary
Building on policy compliance measures, let's examine the practical steps involved in using a bladder scanner effectively.
You'll need to verify that each patient is eligible for the scan, particularly avoiding those with open wounds in the suprapubic area or pregnant women. Start by documenting the voided amount to assess postvoid residual (PVR). If PVR is over 300-500 cc, consider a straight catheterization before proceeding.
When you're ready to scan, make certain you're equipped with the scanner, a scan head, ultrasound gel, and printout paper.
Apply the gel liberally to guarantee good contact between the scan head and the patient's skin, enhancing image quality and patient comfort. Always prioritize patient comfort by explaining the procedure step-by-step, ensuring they feel at ease.
Be vigilant about the scanner's cleanliness. Clean the scan head thoroughly before and after each use to prevent infections and maintain device integrity. Check for any damage or cracks that could affect performance.
If you encounter any issues during the scan, refer to troubleshooting tips provided in the manual. Common problems might include unclear images or error messages, which usually require adjusting the scanner's position or checking for adequate gel application.
Training and Staff Responsibilities
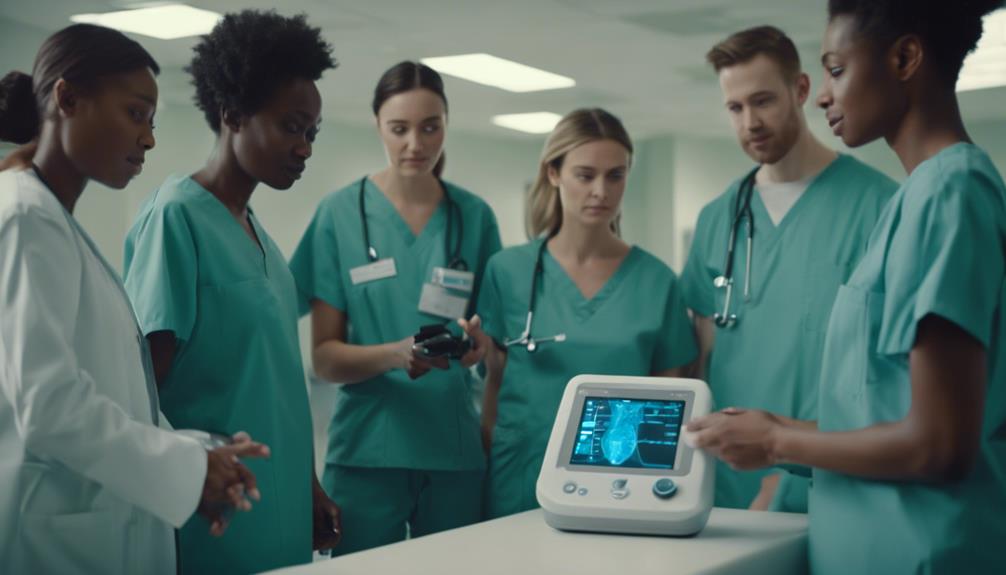
Identifying eligible nursing care positions for bladder scan training is vital to guarantee that the equipment is used correctly and efficiently. You'll need to decide which members of your team should undergo this significant training. Typically, this includes nurses and healthcare assistants who frequently interact with patients needing bladder scans.
Once you've identified the right staff, a thorough training plan should be set up. This plan must cover not only how to operate the scanner but also the protocols for selecting the appropriate patients and understanding contraindications. It's not just about pushing buttons; it's about making certain of patient safety and accuracy in diagnosis.
Your responsibilities overview should clearly assign who's in charge of maintaining and cleaning the bladder scanner. This is essential to meet hygiene standards and maintain device integrity. Make sure specific personnel are designated for these tasks, and they understand their roles thoroughly.
Ongoing education is key. Health care is always evolving, and so are equipment and protocols. Provide regular updates and training sessions to keep your staff current. This guarantees that everyone's knowledge stays fresh, and your patient care remains excellent.
Also, don't forget to monitor and evaluate the effectiveness of the bladder scan implementation regularly. This will help you tweak training and improve patient outcomes continuously.
Essential Equipment Details
As you focus on maintaining your bladder scanner, it's essential to adhere to the specific cleaning protocols and perform regular performance checks.
You'll need to ascertain the scan head is disinfected before and after each use to prevent infections.
Also, regularly test the scanner's functionality to catch any issues early, guaranteeing reliable operation and patient safety.
Equipment Cleaning Protocols
To guarantee your bladder scanner remains in top condition, you must wipe the probe with a soft cloth after each use. This simple step is your first line of defense in maintaining hygiene and guaranteeing the longevity of your equipment.
When selecting a cleaning agent, choose either bleach wipes or a hospital-approved disinfectant. These are effective in killing potential pathogens, thereby enhancing your contamination prevention strategies. Always verify the cleaning agents are compatible with your scanner to avoid damaging the equipment.
Probe maintenance techniques extend beyond mere wiping. After each cleaning, you should inspect the probe for any signs of damage, such as cracks or excessive wear. A damaged probe can compromise the accuracy of your scans and shouldn't be used until it's repaired or replaced.
Lastly, remember to apply ultrasound transmission gel before each use to aid in effective scanning. After the session, make sure to remove any excess gel from the probe. This prevents build-up, which can attract dirt and microbes, and also guarantees the probe is ready for the next use.
Regular cleaning is straightforward and doesn't require extensive staff intervention, thanks to the scanner's design for durability and ease of use.
Regular Performance Checks
Regular performance checks are essential for ensuring your Attendant Prodigy bladder scanner operates at its best. These checks are key to performance optimization, helping you avoid any surprises during routine check-ups. The scanner automatically evaluates its performance with each scan, ensuring accuracy by not displaying compromised results if any issues arise.
If the device detects a problem, you'll see an error message right on the console, facilitating quick error troubleshooting. Don't worry about annual calibrations; your scanner doesn't need them, which simplifies your maintenance routine.
For a hands-on check, you can perform a self-diagnostic test. Just execute five air scans with brief 2-second pauses between each. This will help you verify the functionality without needing any special tools or external support. After the test, results will show on the console and can be cleared simply by placing the probe back in its cradle.
Here's a quick guide to keep in mind:
| Test Type | Frequency |
|---|---|
| Automatic Checks | With each scan |
| Error Messages | As issues occur |
| Self-Diagnostic Test | As needed |
Routine Cleaning Procedures

Maintaining your bladder scanner starts with routine cleaning to guarantee its effectiveness and longevity. Each time you use the scanner, it's vital to wipe down the probe with a soft cloth. This simple step removes any residual gel or contaminants that might skew your results or harm the device.
You'll want to use either bleach wipes or a hospital-approved disinfectant to make sure the probe is thoroughly sanitized. This isn't just a recommendation; it's essential for patient safety and device functionality.
Beyond just wiping it down, you should inspect the probe regularly for any signs of wear or damage. Check for cracks or other impairments every time you clean. If you spot any damage, don't use the scanner. Using a damaged probe can lead to inaccurate results and might even be unsafe.
Always follow the manufacturer's instructions for both cleaning frequency and the types of disinfectants that are safe to use. This adherence not only keeps the scanner in top working condition but also helps extend its lifespan.
Calibration and Performance Checks
You'll be relieved to know that your bladder scanner doesn't require annual calibration, which means you can rely on it day after day without needing frequent adjustments.
However, it's important to pay attention to the automatic performance checks that occur with each scan, ensuring the device operates correctly.
If you receive any error messages, it's essential to address them promptly to avoid compromised results and maintain ideal scanner performance.
Annual Calibration Necessity
Despite common beliefs, the bladder scanner doesn't require annual calibration, which simplifies maintenance for healthcare facilities. This fact dispels one of the prevalent annual calibration myths and emphasizes the calibration frequency importance. Instead, the device utilizes built-in automatic performance checks during each scan to guarantee accuracy.
Here's why you shouldn't worry too much about frequent calibrations:
- Automatic Performance Checks: Each time you use the bladder scanner, it conducts automatic checks that assess the accuracy of measurements.
- Error Monitoring: If any component doesn't meet specified parameters, the console displays error messages, alerting you to potential issues without compromising the results.
- Self-Diagnostic Tests: You can perform self-diagnostic testing, which involves simple air scans that help verify the functionality of the scanner.
These alternative calibration methods provide a robust framework for maintaining the reliability of your bladder scanner without the need for cumbersome annual calibrations.
You'll save time and resources, focusing more on patient care rather than equipment maintenance. Remember, if the scanner ever acts up, those error messages are your first cue to take action, guaranteeing you always deliver accurate assessments.
Routine Performance Assessments
To guarantee the bladder scanner operates with precision, routine performance assessments are critical, even though annual calibration is not required. You'll find that engaging in routine assessment techniques not only secures ongoing accuracy but also prolongs the device's lifespan.
You can perform a self-diagnostic test to gauge the scanner's reliability. This involves conducting five air scans with a full 2-second pause between each. The results, which reflect the operational status, will be displayed right on the console. Here's a straightforward guide to help you keep track:
| Step | Action Required |
|---|---|
| 1. Initiate Test | Perform five air scans |
| 2. Observe Pause | Maintain a 2-second pause between scans |
| 3. Review Results | Check console for diagnostic outcomes |
Through these performance evaluation methods, you're not just checking the numbers; you're securing that every component functions within its specified limits, preserving the scanner's integrity. Remember, scanner reliability checks are not just about ticking off procedures; they're about guaranteeing the accuracy and safety of your assessments. Keep this routine in check, and you'll minimize the risk of operational surprises.
Handling Error Messages
When your bladder scanner displays an error message during calibration or performance checks, it's vital to stop using the device immediately. This action guarantees you're not relying on potentially inaccurate volume measurements, which can be significant for patient care.
Here's how you can effectively handle these error messages:
- Identify the Error Message Type: Recognize what the error message is indicating. The scanner performs automatic checks and will alert you if any component isn't functioning as expected. Understanding the specific error message will guide your next steps.
- Follow Troubleshooting Steps: Once the type of error is identified, refer to your user manual for detailed troubleshooting steps. Most issues might be resolved with simple actions like restarting the device or rechecking connections.
- Contact Direct Supply for Support: If the error persists after basic troubleshooting, it's important to contact Direct Supply for further guidance. They can provide specific instructions or arrange for professional servicing if necessary.
Error Detection and Management

If you receive an error message while using the bladder scanner, immediately stop using the device to prevent inaccurate readings. This immediate suspension is essential to guarantee the integrity of the scan results and the safety of both you and the patient.
Once you've halted operations, your next steps involve a systematic error message response. Don't panic; instead, contact Direct Supply for specific troubleshooting procedures tailored to the issue at hand. They'll guide you through the necessary steps to evaluate the scanner's functionality and determine the root cause of the error.
It's important to follow their instructions closely. The device performs automatic performance checks during each scan, which helps in identifying discrepancies in component measurements early on.
Conducting Self-Diagnostic Tests
Guaranteeing your bladder scanner operates flawlessly starts with conducting self-diagnostic tests. This step is essential, as it not only checks the scanner's efficiency but also aids in early error detection which can save you time and resources in the long run.
Here's how you can effectively perform these tests:
- Clean the Probe: Before you start, make sure the probe is clean. This prevents inaccurate results and maintains the integrity of your scanner's performance.
- Perform Air Scans: Conduct five air scans, with a deliberate 2-second pause between each. This pause is critical for evaluating the proper functionality of the scanner.
- Review Results: After completion, the results will display on the console. This feedback is significant for understanding the operational status of your device.
If any errors are indicated, halt the use of the device immediately. The self-diagnostic tests' importance can't be overstated, serving as a primary troubleshooting technique to guarantee ongoing scanner efficiency.
Remember to clear the data by placing the probe back in the cradle, setting the stage for accurate future diagnostics.
Support and Contact Information

For any operational issues with your Attendant Prodigy bladder scanner, Direct Supply offers dedicated support to address your concerns quickly and effectively. They understand that maintaining device integrity is essential for your daily operations.
That's why they've developed robust user support strategies that guarantee you can always get the help you need.
When you're facing a problem, you've got several contact methods at your disposal. You can reach out directly to your account manager for personalized assistance. They're not just there to help; they're your partners in guaranteeing that your bladder scanner functions flawlessly.
Additionally, Direct Supply's customer service team is readily available via phone or email to assist with any inquiries or troubleshooting issues.
Don't forget to utilize the thorough troubleshooting resources provided. These resources are specifically designed to help you understand and solve common issues that might arise with your scanner.
They include step-by-step guides and FAQs that cover everything from simple operational questions to more complex maintenance challenges. By taking advantage of these tools, you'll not only solve your current issues but also enhance your knowledge for future troubleshooting.
Bibliography and Further Reading
As you seek to deepen your understanding of bladder scanner maintenance, consider exploring various scholarly articles and technical manuals that address advanced troubleshooting and upkeep techniques.
These resources not only provide detailed insights but also guarantee you're equipped with the latest best practices in infection control and equipment longevity.
To help you get started, here's a concise list of essential readings:
- "Advanced Bladder Scanner Maintenance Techniques" – This manual investigates the complexities of maintaining your equipment, emphasizing the importance of regular cleaning and the impact of environmental factors on device performance.
- "Infection Control Protocols in Medical Equipment Handling" – A vital guide that outlines step-by-step procedures for disinfecting medical devices, including bladder scanners, to prevent cross-contamination and guarantee patient safety.
- "Guaranteeing Longevity of Hospital Equipment: A Thorough Guide" – This book offers insights into the routine checks and balances necessary to extend the life of medical equipment, with a special focus on non-invasive diagnostic tools like bladder scanners.
Exploring these resources won't only enhance your maintenance skills but also guarantee that you're up-to-date with the current standards and expectations in healthcare equipment management.
What Maintenance is Necessary for Bladder Scanner Devices to Ensure Proper Functioning?
Regular maintenance of bladder scanner devices is crucial for ensuring proper bladder scanner device function. This includes cleaning the probe and device, calibrating the equipment, and ensuring proper battery function. Regular inspections and servicing can help prevent malfunctions and ensure accurate readings for patients.
Frequently Asked Questions
How Do You Clean a Bladder Scanner?
To clean a bladder scanner, start by wiping the scanner head with a soft cloth after each use.
Follow up with bleach wipes or suitable hospital disinfectants to thoroughly sanitize the probe.
Always check for any damage and guarantee it's in good condition before storage.
Adhering to these cleaning techniques and disinfecting protocols not only keeps the scanner safe but guarantees its accuracy and longevity.
Always refer to the manufacturer's guidelines for detailed instructions.
Do Bladder Scanners Need to Be Calibrated?
You don't need to worry about frequent calibration for your bladder scanner. It automatically checks its accuracy with each use.
If it detects any deviations, you'll see error messages, ensuring no compromised results are presented.
There's no need for a detailed maintenance checklist focused on calibration. Just keep an eye on the scanner's performance through its self-checks, and you'll maintain its reliability without manual calibrations.
What Is the Lifespan of a Bladder Scanner?
The lifespan of your bladder scanner largely depends on how well you maintain it.
With durable bladder scanner technology and robust scanner device features, you can expect years of reliable use.
Adhering to maintenance best practices, like regular cleaning and handling with care, guarantees your device stays in tip-top shape.
How Often Should You Repeat a Bladder Scan?
You should repeat a bladder scan based on bladder scan frequency protocols, patient symptoms, and clinical judgment.
Advances in ultrasound technology allow for more precise measurements, aiding in decisions about scan frequency.
Typically, if the postvoid residual exceeds 300-500 cc, or if there's a change in bladder habits, a repeat scan is necessary.
Always document voided amounts accurately to guide the necessity and timing of subsequent scans.
Conclusion
To keep your bladder scanner in top shape, follow the manufacturer's guidelines for cleaning and maintenance. Always disinfect the scan head before and after use, inspect it regularly for any damage, and run self-diagnostic tests to guarantee accuracy. Remember, if you spot any cracks or wear, stop using the device immediately and contact support. By staying diligent with these practices, you'll extend the lifespan of your equipment and maintain its reliability for accurate diagnostics.
